RA-4 printing with AGO
Basics of RA-4 Printing with AGO Film Processor
First, a big thank-you to Mario Mazzotta from Colla Lab, Italy, for sharing his deep knowledge of RA-4 printing. His experience has helped shape our approach.
This guide is a starting point for anyone interested in making RA-4 color prints at home. It focuses on the essentials for consistent results using a color enlarger and the AGO Film Processor. While more advanced techniques exist, this will guide you to your first successful prints.
We’ve divided the instructions into three parts: Practical Theory, Enlarging, and Developing.

Brief Description of the Process
RA-4 printing starts by loading your C-41 color negative into the enlarger, adjusting size and focus, and exposing RA-4 paper. After exposure, the paper is loaded into a Paterson tank with a paper reel, allowing daylight development.
- Color Developer
- Blix (bleach + fixer)
After a water rinse, the print is complete. Adjust exposure, aperture, or color balance with enlarger filters as needed until satisfied.
Practical Theory
Exposure and Making a Test Strip
Use a test strip to determine correct exposure: cover part of the paper during initial exposure, uncover in steps (3 s intervals) to create bands from light to dark. Start at f/8. Choose the patch with the best tone as your base exposure.
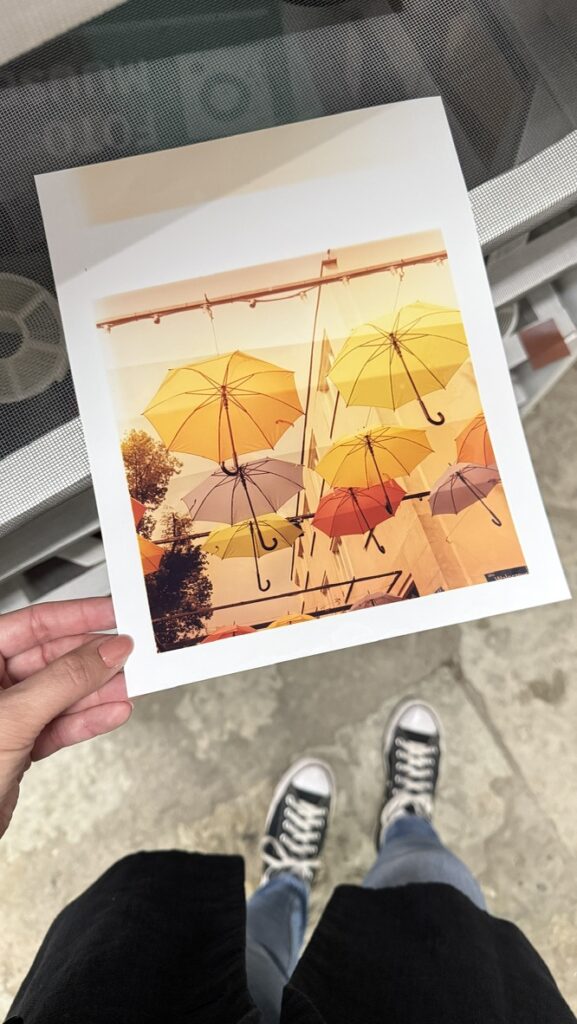
Exposure test strip – 3, 6, 9, 11, and 13 seconds; 11 s chosen for final print.
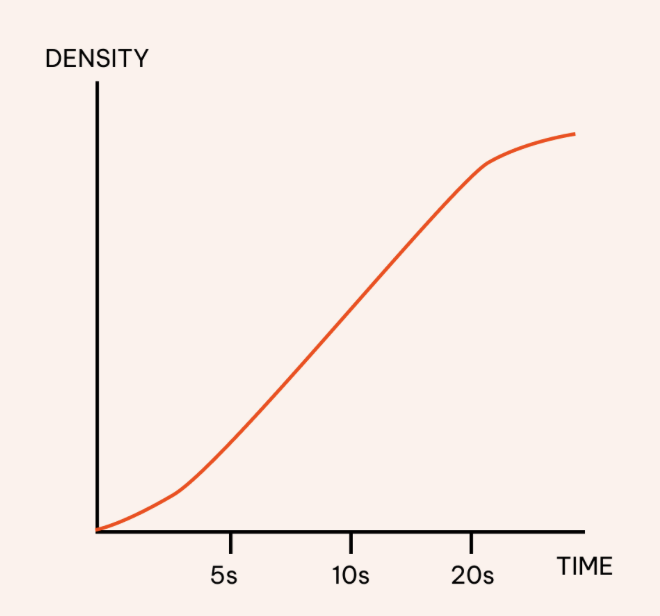
More light → Darker print (Dark = Dense)
Color Correction
Start with: Magenta 60, Yellow 60, Cyan 0. Adjust M and Y based on shifts you see—especially in neutral tones like skin.
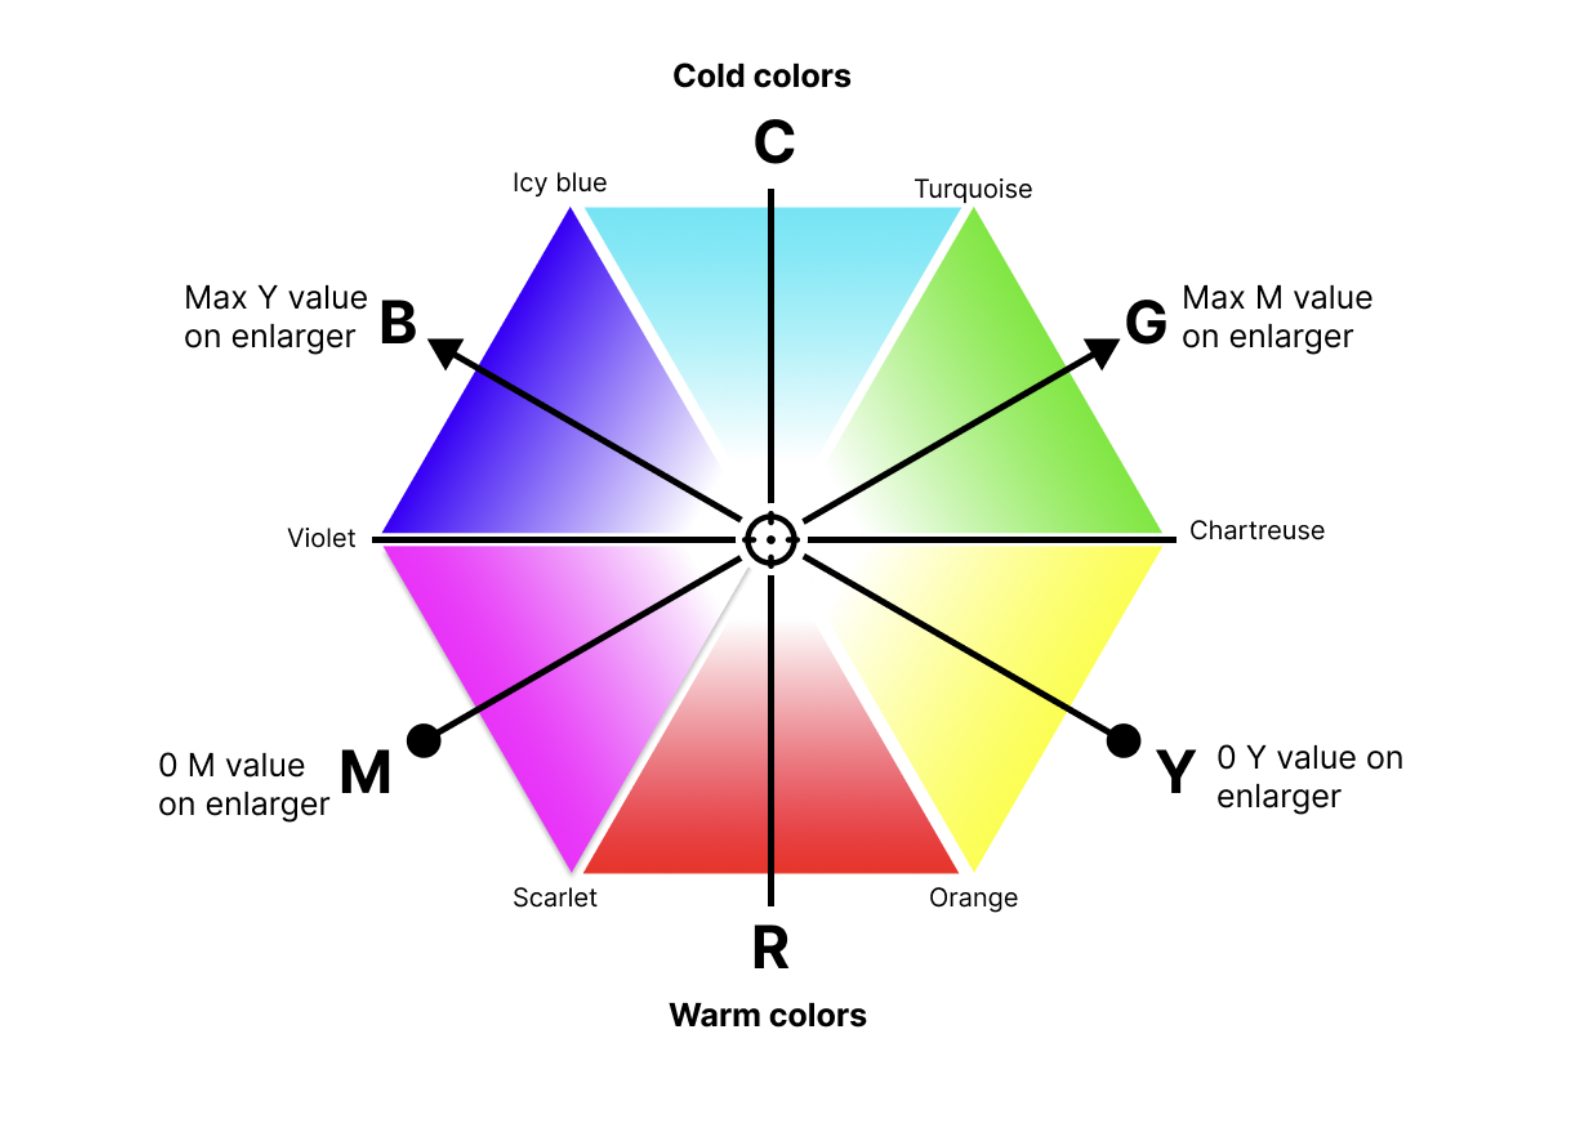
How to Know if Color is Correct
Skin tones are the best indicator—should look natural and warm without odd casts.
Pro Tip – Thinking in F-Stops
Think in stops, not seconds, for consistent exposure adjustments.
Pro Tip – Dodging and Burning
Dodging blocks light to lighten an area; burning adds extra exposure to darken. Keep the tool moving to avoid hard edges. Start with small adjustments (+½ stop).
Enlarging – Step-by-Step Guide
Preparing the Negatives: Choose well-exposed C-41 negatives with good density. Avoid transparent base films like Kodak Aerocolor or Harman Phoenix.
- Place the negative in the holder, emulsion side down (matte side down, shiny side up).
- Use a dust blower.
- Insert the holder into the enlarger securely.
Adjust Print Area and Focus
Use a sacrificed paper to set size and focus. Masking frame optional. Focus sharply on film grain with a focus finder.
Make a Test Strip
- Aperture: f/8
- Timer: 3 s
- Filters: Y 60, M 60, C 0
Developing – Step-by-Step Guide
- Developer: 45 s at 35 °C (suggest ~32 °C)
- Blix: 1 min at 35 °C (~32 °C works)
- Wash: 2 min cold water
Preparing the Chemicals
Mix per instructions. Store in 1 L bottles. Warm to ~32 °C. AGO runs standard program for 35 °C—no time changes needed.
Developing RA-4 Paper with AGO
- Attach AGO to tank and seal.
- Pour in 250 ml developer, start process.
- Repeat for blix and wash.
Pro Tip – Chemical Replenishment
Reuse developer for up to 15 prints. Replace a portion with fresh after each print for consistent quality.
| Paper Size | Developer | Blix |
|---|---|---|
| 4×6″ | 8 ml | 4 ml |
| 5×7″ | 11 ml | 6 ml |
| 8×10″ | 26 ml | 13 ml |
| 9.45×12″ | 35 ml | 17 ml |
| Per 1 sq ft | 46.5 ml | 23 ml |
| Per 1 m² | 500 ml | 250 ml |
Pro Tip – Pre-Exposure
Pre-expose paper for 1–3 s at f/11–f/16 to help bring out shadow detail in high-contrast negatives. Avoid overdoing it to prevent fogging.