How to Develop Color Film at Home (C-41 Process) – Step-by-Step Beginner’s Guide
Home » Vintage Visual » How to Develop Color Film at Home (C-41 Process) – Step-by-Step Beginner’s Guide

Why Develop Color Film at Home?
If you’ve been sending your precious color rolls to a lab and wondering “could I develop color film at home myself?” – the answer is absolutely yes. Developing C-41 color negative film at home isn’t the mysterious, expensive process many imagine. In fact, it uses the same basic equipment as black and white film development, just with different chemistry and a bit more attention to temperature.
The benefits are compelling: you’ll save money (especially if you shoot regularly), get immediate results without waiting for lab turnaround, maintain complete control over your negatives, and gain the satisfaction of mastering the full analog photography process. Plus, you get bragging rights for processing your vacation photos in your own kitchen sink.
Many photographers assume color development requires professional lab equipment, but that’s simply not true. The C-41 process has been simplified for home use through pre-packaged kits that make it as straightforward as following a recipe. If you can boil water to ~38°C (100°F) and follow timing, you can develop beautiful color negatives at home.
What You Need – Tools, Equipment & C-41 Kits
Essential Equipment
The good news is that home color film development uses the same basic tools as black and white processing. If you already develop B&W film, you just need to add C-41 chemistry to your setup:
Core Equipment:
- Developing tank and reels (Paterson tank is most popular) for your film format (35mm or 120)
- Changing bag or dark space to load film onto reels in complete darkness
- Accurate thermometer reading up to 40°C/104°F (digital cooking thermometers work great)
- Measuring cylinders or graduates for mixing chemicals (500ml and 1000ml sizes ideal)
- Storage bottles – three airtight bottles for developer, blix, and stabilizer (amber glass preferred)
- Timer (smartphone apps work fine)
- Funnel for pouring chemicals
- Gloves for safety
- Film clips for hanging film to dry
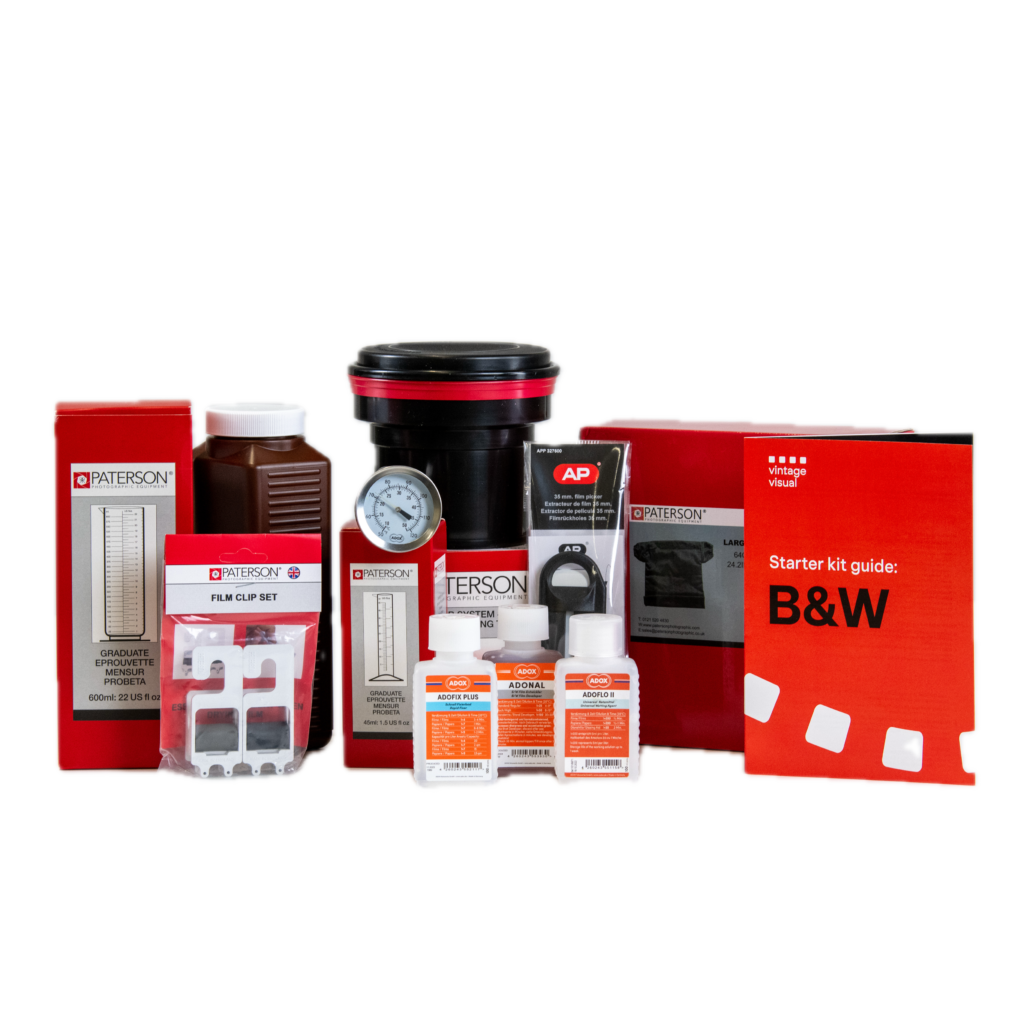
If you’re starting from scratch, consider an all-in-one solution like the Starter Kit for B&W from Vintage Visual, which includes a Paterson tank, reels, thermometer, measuring tools, changing bag, and other essentials. While marketed for black and white, this kit covers all the hardware needed for color development too – you just add the C-41 chemistry separately.

C-41 Chemistry Kits: Which to Choose?
Several reputable brands offer beginner-friendly C-41 kits. Here are the most popular options:
For Simplicity (2-Bath Blix Kits):
- CineStill CS41 2-bath kit – Popular liquid kit combining bleach and fix into one “blix” solution. Convenient for beginners.
- Arista C-41 liquid kit – Similar to CineStill (often identical chemistry) and widely available in the US.
For Maximum Quality (3-Bath Kits):
- Tetenal Colortec C-41 – German powder concentrate kit known for reliability and longevity. Popular in Europe.
- Bellini C-41 kit – Italian kit with separate bleach and fix solutions, praised for extended chemical life.
- Kodak Flexicolor – Professional lab chemistry, excellent results but requires mixing larger quantities.
Recommendation for beginners: Start with whichever kit is easily available in your region. In the US, CineStill or Arista kits work excellently. In Europe, Tetenal or Bellini kits are popular choices. All major brands produce great results when instructions are followed properly.
Kit sizes typically range from 1-liter (develops 8-10 rolls) to 2.5-liter (develops 20+ rolls). If you’re just starting or shoot occasionally, a 1-liter kit is perfect for learning.
Optional Equipment for Easier Processing
Temperature Control:
- Sous vide immersion heater – Maintains precise 38°C water baths
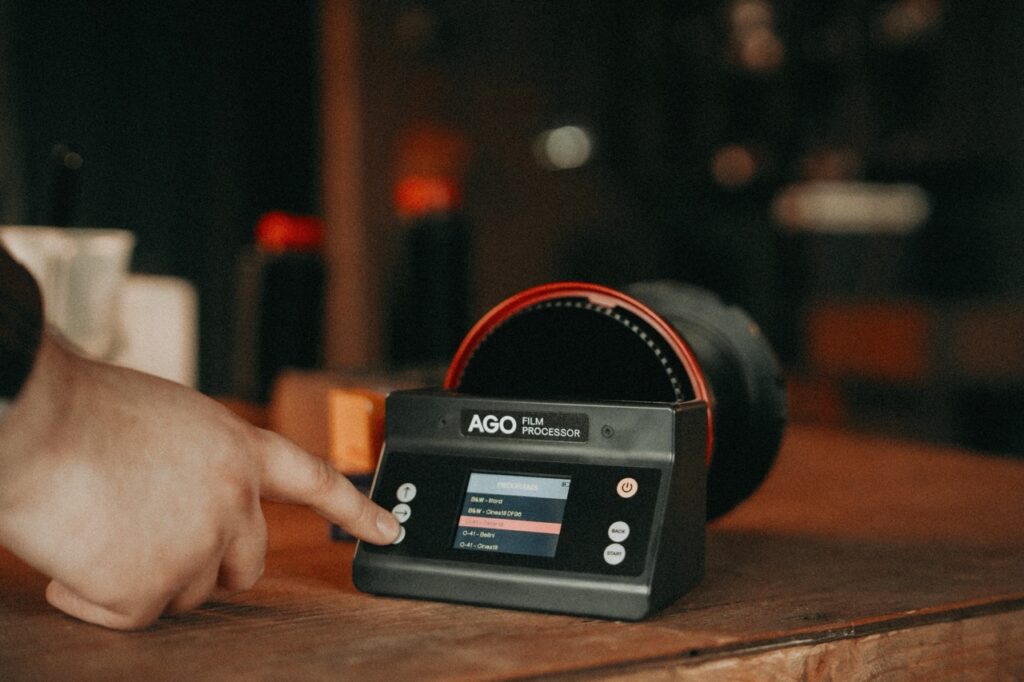
- AGO Film Processor – Automated processor with temperature compensation and consistent agitation, eliminating guesswork for beginners
The AGO Film Processor deserves special mention as it automates the most challenging aspects of C-41 development. Instead of manually maintaining temperature and timing agitation, the AGO provides consistent rotation and automatically adjusts development time based on actual chemical temperature. This removes much of the anxiety beginners feel about temperature control.

Step-by-Step: C-41 Film Development Process
Before You Start
- Prepare your workspace – Lay out all equipment, ensure good lighting for the chemical steps
- Mix your chemicals according to kit instructions (if using powder concentrates)
- Heat chemicals to ~38°C (100°F) using a hot water bath
- Practice loading film in daylight with a scrap roll if you’re nervous
The Development Process
Step 1: Load Film (In Complete Darkness)
Transfer your exposed film from its cartridge onto the developing reel and into the tank. Once the tank is closed with its light-tight lid, you can work in normal lighting. Tip: Cut the film leader straight and practice the motion beforehand.
Step 2: Pre-Soak (Optional)
Some kits recommend a 1-minute pre-soak with 38°C water to bring the film to temperature. Check your kit instructions.
Step 3: Developer
Pour in the developer at 38°C (100°F). Start your timer immediately – typically 3:15 to 3:30 minutes for most kits. Agitate continuously for the first 10 seconds, then 4-5 inversions every 30 seconds. Begin draining about 10 seconds before time expires to prevent over-development.
Step 4: Stop Bath/Rinse (Optional)
Many kits go directly to blix, but a 30-second water rinse can improve consistency and extend chemical life.
Step 5: Bleach-Fix (Blix)
Pour in the blix solution, typically for 6-8 minutes at 38°C (some kits allow room temperature). Agitate every 30 seconds. Note: Blix produces gas, so occasionally “burp” your tank by loosening the lid slightly to release pressure.
Step 6: Wash
Rinse thoroughly with water at ~38°C for 3-5 minutes, changing water several times to remove all chemical residue.
Step 7: Stabilizer
Final bath in stabilizer (room temperature) for about 1 minute with gentle agitation. This prevents color dye fading and water spots. Do not rinse after – proceed directly to drying.
Step 8: Dry
Hang your developed negatives with clips in a dust-free area. Room temperature air drying takes about 2 hours. Avoid heat or forced drying.
Temperature Control Tips
- Hot water bath: Place chemical bottles in a basin of 50–55°C water until they reach proper temperature
- Sous vide method: Use a kitchen sous vide device for precise temperature control
- Insulation: Wrap your tank in towels between steps to retain heat
- AGO processor: Eliminates temperature anxiety with automatic compensation
FAQ: Common Beginner Questions
Can I develop color film at home without a darkroom?
Yes, absolutely. You only need darkness for loading film onto the reel, which a changing bag handles perfectly. All chemical steps happen in normal room lighting once the film is secured in the light-tight tank.
How hot do the chemicals need to be for C-41?
Standard C-41 development requires ~38°C (100°F) for the developer, ideally maintained within 0.5°C. Some kits offer room temperature alternatives with extended times, but results may vary.
Can I reuse C-41 chemicals?
Yes, C-41 kits are designed for reuse. Most 1-liter kits reliably develop 8–10 rolls, often more with careful handling. Store used chemicals in labeled, airtight bottles. Many photographers get 15+ rolls by extending development time slightly for later batches.
How many rolls can I develop with one kit?
Typically 8–10 rolls per liter are guaranteed, but actual capacity varies with storage conditions and usage patterns. Larger kits offer better economy – a 2.5L kit might develop 25+ rolls.
Is developing color film at home cheaper than using a lab?
If you shoot regularly, yes. Labs typically charge $7–15 per roll for C-41 development. Home development costs approximately $2–4 per roll in chemistry (after initial equipment investment). The equipment “pays for itself” after 10–15 rolls.
What about safety with C-41 chemicals?
C-41 chemicals are safe with basic precautions: wear gloves, work in ventilated space, avoid inhaling powder dust, and keep chemicals away from children. The blix has an odor and can stain clothing, so wear old clothes or an apron.
Do different color films need different development times?
No – all C-41 films (Kodak Portra, Fuji stocks, etc.) use identical times and temperatures. The beauty of C-41 is its standardization across all color negative films.
How do I dispose of used chemicals?
Small quantities can be diluted and disposed down the drain in many areas, but check local regulations. The most environmentally responsible method is taking used chemistry to hazardous waste facilities, especially blix which contains silver.
Troubleshooting Guide
Color Cast Issues
Symptoms: Negatives scan with strong color tints
Causes: Temperature deviations during development, exhausted chemicals, scanning issues
Solutions: Verify thermometer accuracy, use fresh chemicals, check scanning setup
Blank or Thin Negatives
Symptoms: No images visible or very faint images
Causes: Exhausted developer, contamination between chemicals, severe temperature deviations
Solutions: Mix fresh developer, use separate tools for each chemical, verify temperature control
Dense (Dark) Negatives
Symptoms: Negatives very dark, scans appear muddy
Causes: Over-development from excessive time or temperature
Solutions: Check timer accuracy, verify temperature control, reduce development time if necessary
Brown Spots or Residue
Symptoms: Brown marks or milky appearance on dried film
Causes: Insufficient fixing or washing
Solutions: Re-fix in fresh blix, extend wash times, use distilled water for final rinse
Cross-Contamination Problems
Symptoms: Inconsistent results, chemical degradation
Prevention: Use separate funnels and measuring tools for each chemical, label everything clearly, rinse tank between steps
Final Tips for Success
- Organization is key: Lay out all equipment before starting. Label your storage bottles clearly (Developer, Blix, Stabilizer).
- Track your usage: Note how many rolls you’ve developed with each chemical batch.
- Temperature matters, but don’t panic: A 1°C variation won’t ruin your negatives.
- Practice the motion: Load a scrap roll in daylight first to build muscle memory.
- Start with fresh chemicals: Eliminate variables by beginning with a new batch.
- Keep detailed notes: Track temps, times, and results to troubleshoot and improve.
Conclusion & Next Steps
Developing color film at home transforms you from a passive consumer of lab services into an active participant in the complete photographic process. The C-41 process, while requiring attention to temperature and timing, is entirely achievable in any home kitchen with basic equipment and quality chemistry.
Once you’ve mastered color negatives, consider exploring black and white development (more forgiving and creative) or even slide film processing (E-6). Each process builds on the skills you’ve learned with C-41.
Now grab that roll of exposed film and start developing – your kitchen darkroom awaits.
Structured FAQ
-
- Q: Can I develop color film at home without special equipment?
A: Yes, you can develop C-41 color film at home using basic equipment like a developing tank, thermometer, and changing bag. No darkroom required.
- Q: Can I develop color film at home without special equipment?
-
- Q: What’s the best C-41 kit for beginners?
A: CineStill CS41, Arista, or Tetenal kits are all excellent for beginners.
- Q: What’s the best C-41 kit for beginners?
-
- Q: How do I maintain 38°C temperature for C-41 development?
A: Use a hot water bath, sous vide, or an automated processor like AGO.
- Q: How do I maintain 38°C temperature for C-41 development?
-
- Q: Is it cheaper to develop film at home than using a lab?
A: Yes. Home development costs ~$2–4 per roll vs. $7–15 at labs.
- Q: Is it cheaper to develop film at home than using a lab?
-
- Q: Can I reuse C-41 chemicals multiple times?
A: Yes, most kits develop 8–10 rolls, often more with proper care.
- Q: Can I reuse C-41 chemicals multiple times?
-
- Q: How long do mixed C-41 chemicals last?
A: 2–6 months depending on type and storage conditions.
- Q: How long do mixed C-41 chemicals last?
-
- Q: Do I need different times for different color films?
A: No – all C-41 films follow the same standard development time.
- Q: Do I need different times for different color films?
