Getting Started
Now that you’ve successfully assembled your AGO Film Processor and prepared your films for development, let’s delve into the user-friendly interface and the steps to initiate the film development process.
1. Turn Ago ON
Hold down the on/off button for 2 seconds and the AGO Film Processor logo should emerge. Click any button to move forward. Charge the battery if your AGO doesn’t turn on. The battery logo should emerge on the screen once the charger is attached.
2. Battery check
Before proceeding look that you have at least one bar of battery. Otherwise, attach a charging cable to proceed. A full battery usually enables a day’s worth of film development.
3. Choose the program
From the main menu choose “DEFAULT PROGRAMS”. From the programs menu choose a suitable program.
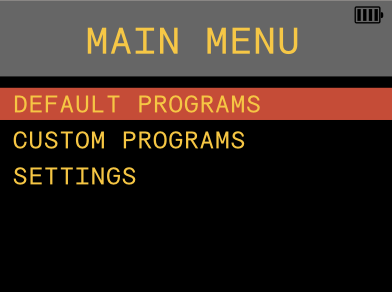
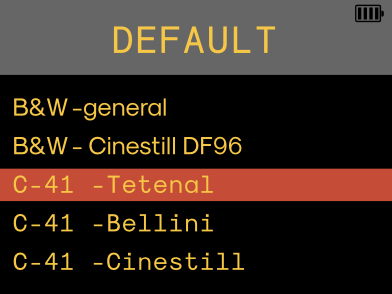
Your own generated programs can be found under “CUSTOM PROGRAMS”.
4. If needed make changes to the program
This is the program overview page where you should make sure that every aspect of the process is as you want before starting the process. Here for each step of the development process, you can customize the time, choose the agitation method, and decide whether to enable time compensation or not.
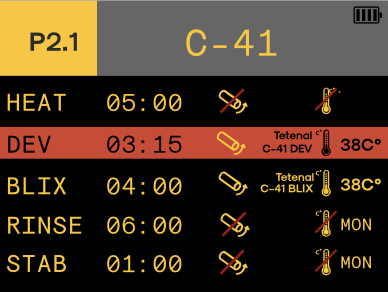
Use the right arrow to move between items. Yellow shows you which of the items is highlighted in other words active. To change settings use the up arrow and down arrow.
The cylindrical shape shows you which agitation method is being used. A horizontal cylinder means horizontal agitation. A vertical cylinder means vertical agitation. A strikeout cylinder means that no agitation is done at this process step.
Attention: In vertical agitation, the automatic time compensation is switched off!
5. Start the process
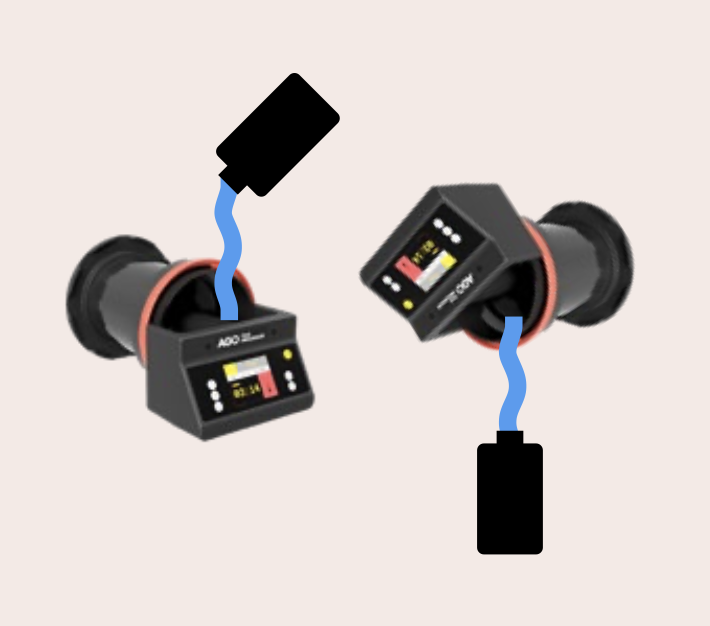
Now just pour in the right chemical. When using the rotational agitation method, pour your chemicals into the tank slowly by the AGO’s sink and press START. After the time gets to zero it is time to pour out the chemicals.
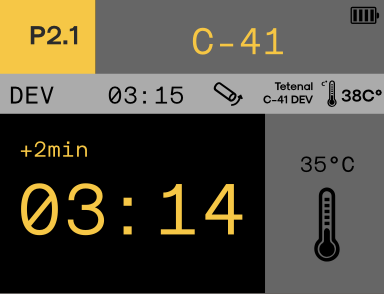
You can pour out chemicals without detaching AGO from the Paterson tank. Just hold from the tank holding everything upside-down and pour out the chemicals. The liquid should be flowing out over the rim of the tank. Now pour in the next chemical and press START again. Carry on once you get all the steps done.
6. Film washing
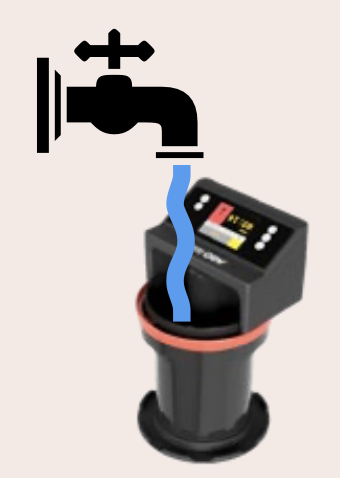
The last step in the process is usually film washing. We suggest doing it so the tank is vertically and under the tap, using running water. Use the processor’s running motor for better washing or detach it and use it as a timer.
7. Hang film to dry
After the process is done remove film from film reels and hang them to dry.
8. Clean up
Always clean your AGO after the development process. The easiest way is to use a wet cloth to remove chemical residue from the device. Don’t submerge the device in water.
End
This is an overview of how the user workflow would typically look like when using AGO Film Processor. Read other Wiki articles to dive in further into the topics you’re interested in.
