Developing your first BW film
How to Develop Black and White Film at Home
Developing black and white film at home is simpler than processing color film but still requires the right tools, attention to detail, and patience. Here’s a step-by-step guide:
What You Need
- Film Developing Tank – A container that holds reels inside and allows chemicals to be poured in and out.
- Reels – Used to load your film. Ensure they’re suitable for your film format (35mm, 120, 4×5, etc.).
- Darkroom or Changing Bag – Used to load film onto the reel and place it in the tank in complete darkness.
- Thermometer – Ensures the chemicals are at the right temperature before pouring them into the tank.
- Film Clips – Used to hang the film for drying.
- Measuring Cylinders – For measuring and mixing the chemicals.
- B&W Chemicals – Typically includes developer, fixer, and wetting agent. Follow the chemical producer’s instructions for mixing.
- Storage Bottle – Used to store mixed fixer. Other chemicals are typically “one-shot,” meaning they should be discarded after use.
- Scissors – Needed for 35mm film to cut the end of the film inside the changing bag.
- Distilled Water (optional) – If your local water is mineral-rich, it might be helpful to use distilled water.
- AGO Film Processor (optional) – Helps maintain temperature control throughout the developing process.
- Timer (not needed with AGO) – Used to track processing times.
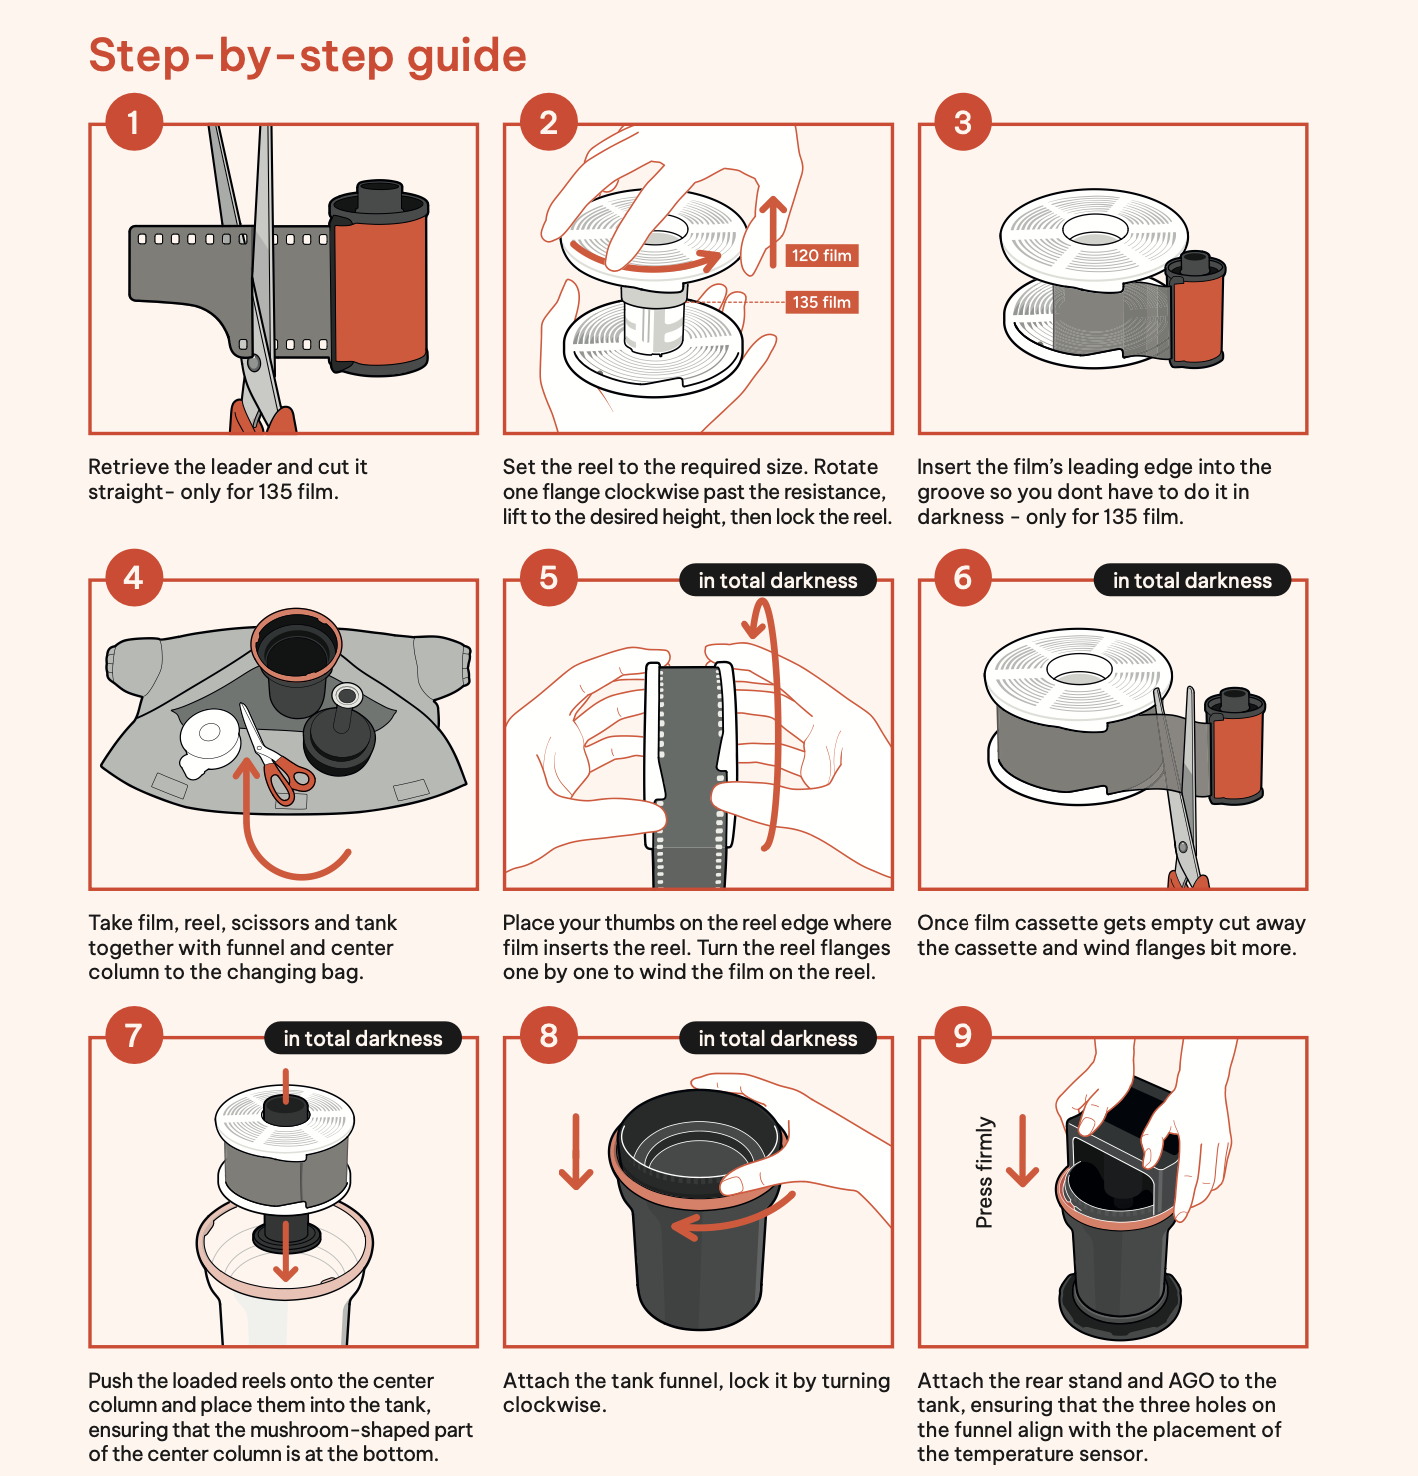
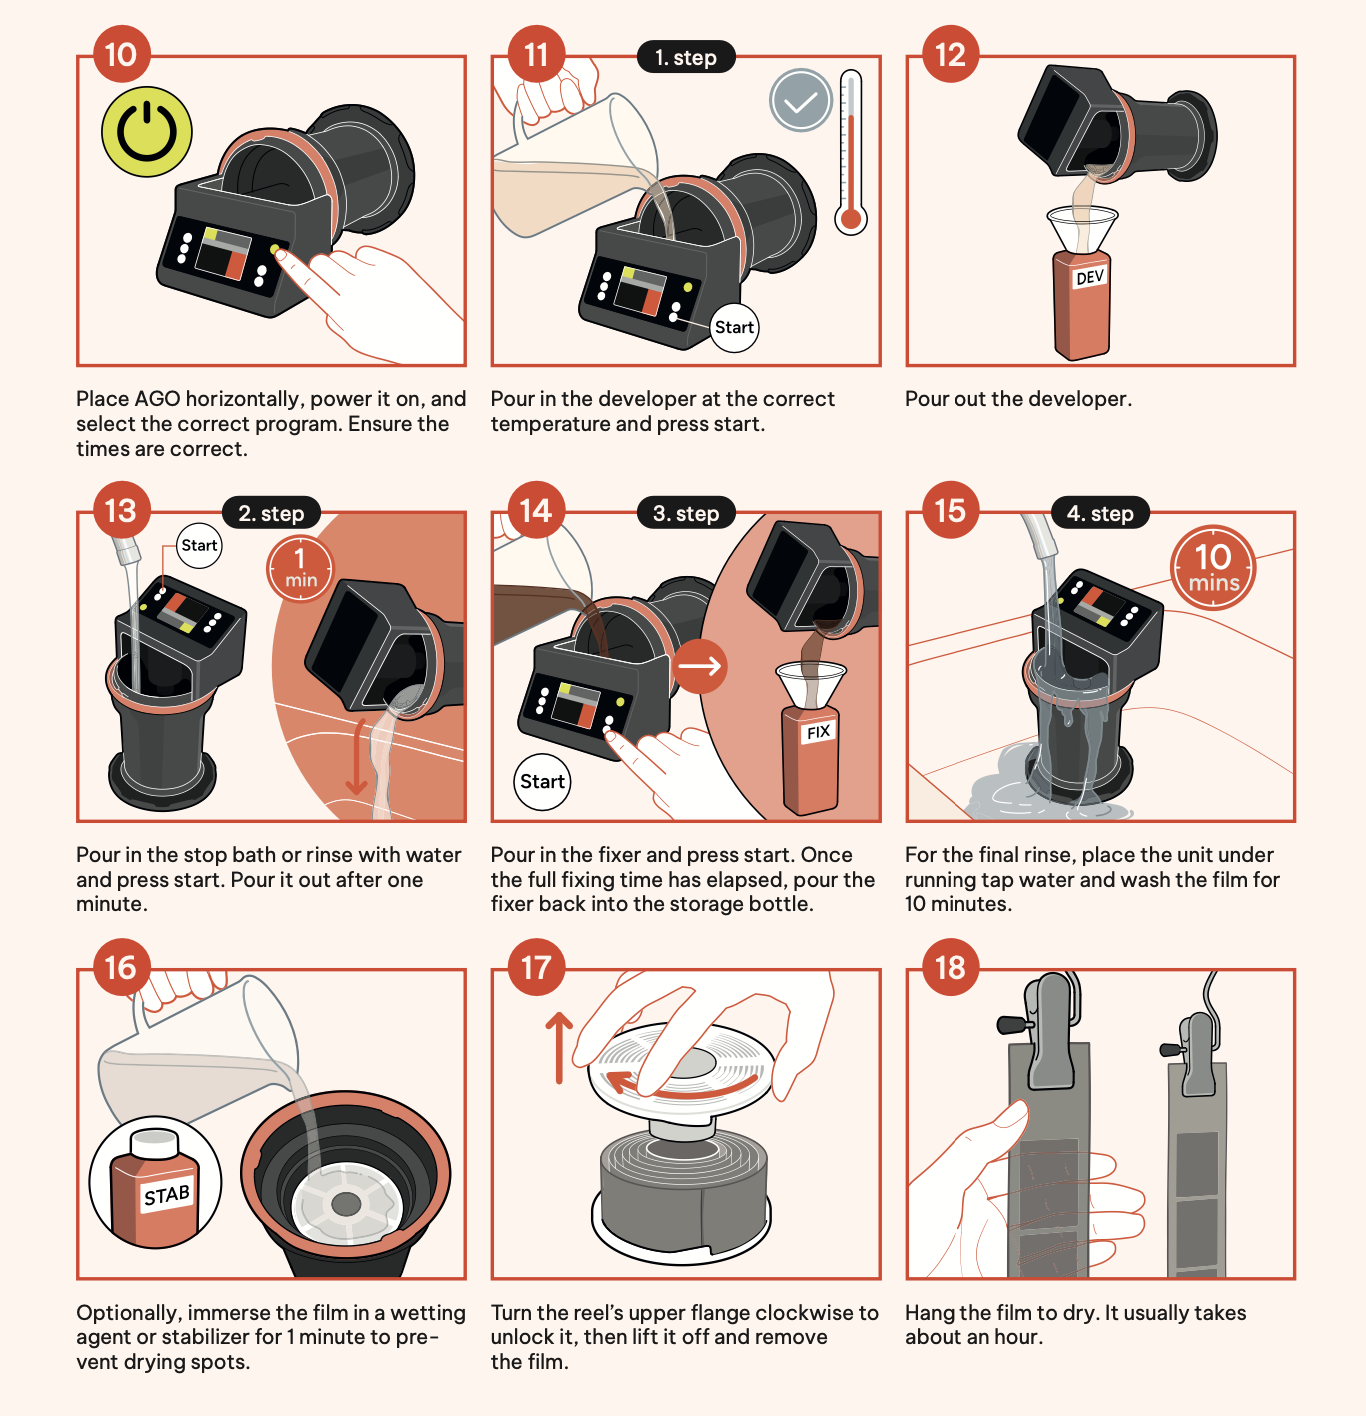
Click here to view step-by-step as images


Step-by-Step Process
- Load the Film: In complete darkness, load the film onto the reel and place it inside the developing tank. Seal the tank securely.
- Prepare the Fixer: Mix your fixer according to the manufacturer’s instructions, ensuring it is at the recommended temperature (around 20°C or 68°F).
- Prepare the Developer: Visit Digital Truth’s DevChart to find the correct development time and dilution ratio for your specific film and developer combination. Calculate how much developer is required based on your tank size.
Example: For Ilford HP5 (ISO 400) film and Adonal (Rodinal) developer:
- HP5 + Rodinal (1+25) = 6 minutes
- HP5 + Rodinal (1+50) = 11 minutes
We choose 1+25 for 6 minutes. For one roll of 35mm film, you’ll need 290ml of developer. 290 ÷ 25 = 11.6ml concentrate. Mix 11.6ml developer with water at 20°C to make 290ml total.
- Developing:
- Pour in the developer, start the timer, and agitate continuously for the first 30 seconds.
- Then agitate for 5-10 seconds every minute for the recommended time.
- Pour out the developer immediately when time is up.
- Stop Bath:
- Pour in stop bath (water or solution) and agitate for 30 seconds to 1 minute.
- Pour out the stop bath.
- Fixing:
- Pour in fixer and agitate for the first 30 seconds, then 5 seconds every minute.
- Fixer time is typically 4–10 minutes.
- Pour out the fixer when done.
- Washing:
- Rinse film with running water for 5–10 minutes. Hypo-clear can speed this up.
- Wetting Agent (Optional):
- Add a few drops to rinse water and soak for 1 minute to prevent water spots.
- Discard solution after use.
- Drying:
- Hang the film with clips in a dust-free area for 1–2 hours until fully dry.
- Digitize or Darkroom Print: Scan or print once the negatives are dry.
- Cutting and Storing: Cut into strips of 4–6 frames and store in archival sleeves.
Tips
Volume Needed:
- Paterson tank: 290ml per 35mm roll, 500ml per 120 roll.
- AGO processor: see user manual.
Temperature Control: Maintain 20°C for consistent results.
Agitation Methods:
- Constant Agitation: Motorized units do this automatically.
- Hand Agitation: Invert for first 30 seconds, then 4 inversions every 30 seconds.
Constant Agitation Adjustment: Reduce development time by ~15% in rotary processors.
Fresh Chemicals: Developer should turn film black, fixer should make it transparent.
Chemical Reuse: Fixer can be reused; developer is usually one-shot.
Troubleshooting
- Underdeveloped Film: Caused by low temp or short time.
- Overdeveloped Film: Caused by long time or high temp.
- Streaks or Spots: Often from poor washing or drying.
Developing B&W Film with AGO Film Processor
Conclusion
Developing black-and-white film at home is a rewarding and creative process. By following these steps and paying close attention to temperature, timing, and agitation, you can create beautiful, high-quality negatives.
