
Most film photographers remember pulling their first developed negatives from the tank, holding them up to the light, and seeing actual frames. Images they made, chemistry they mixed, a process they completed by hand. It feels different from dropping a roll at a lab. It feels like something you built.

Home film development is not a difficult skill to learn. It takes one afternoon to do your first roll, and by your third or fourth the whole thing starts to feel like a natural rhythm. The cost per roll in chemistry drops to under a euro. You gain complete control over how your negatives look. And for a lot of people, it becomes their favourite part of shooting film.
Black and white film is the right place to start. You don't need a heated water bath, the chemistry is forgiving enough that your early rolls will come out well, and within a couple of sessions the whole process starts to feel like second nature.
This guide covers everything you need for your first roll of B&W: equipment, chemistry, how to find development times, the full step-by-step process, agitation technique, and troubleshooting. Prefer to watch before you read? Skip to the video walkthrough.
Why Start with Black and White Film?
Black and white development has a wider tolerance for small timing and temperature variations than colour processes. The standard development temperature is 20°C (68°F), which is room temperature, so you don't need a heated water bath or constant temperature monitoring. That alone takes a lot of pressure off your first attempt.
The chemistry is simple too. Developer, stop bath, fixer, and an optional wetting agent. Because B&W tolerates small deviations generously, your first few rolls are far more likely to come out well compared to attempting colour development straight away.
The costs are modest. A bottle of Rodinal developer costs around €10–15 and can develop 50 or more rolls at high dilution. Fixer is reusable for many rolls. Once you have a tank and reels, the ongoing cost per roll is typically under €1. Learning B&W first also gives you a solid feel for the full process before you take on the tighter temperature demands of colour chemistry.
What You Need to Get Started
A home film processing kit like the Black & White Starter Kit includes all the essentials for your first roll. Here is what you will need.
Included in a standard starter kit
- Film developing tank and reels. The tank holds your loaded film and allows chemistry to be poured in and out in normal daylight once sealed. Make sure the reels match your format, whether 35mm, 120, or both.
- Changing bag. A light-tight bag for loading your film in complete darkness. Works anywhere, no dedicated darkroom needed.
- Thermometer. For checking that your chemistry is at 20°C before you begin.
- Measuring cylinders. For accurately measuring and mixing chemistry.
- Storage bottle. For storing fixer between sessions. Developer is typically one-shot and discarded after use.
- Film clips. For hanging film to dry after processing.
- B&W chemistry. Developer, fixer, and wetting agent. Mix according to the manufacturer's instructions.
Additional items worth having
- Scissors. For trimming the 35mm film leader to a straight edge before loading. You will need them inside the changing bag.
- Timer. A phone works fine. Not needed if you are using the AGO Film Processor, which handles timing automatically.
- Distilled water (optional). Helpful if your tap water is mineral-rich, to prevent drying spots on negatives.
Prefer a hands-off approach from day one?
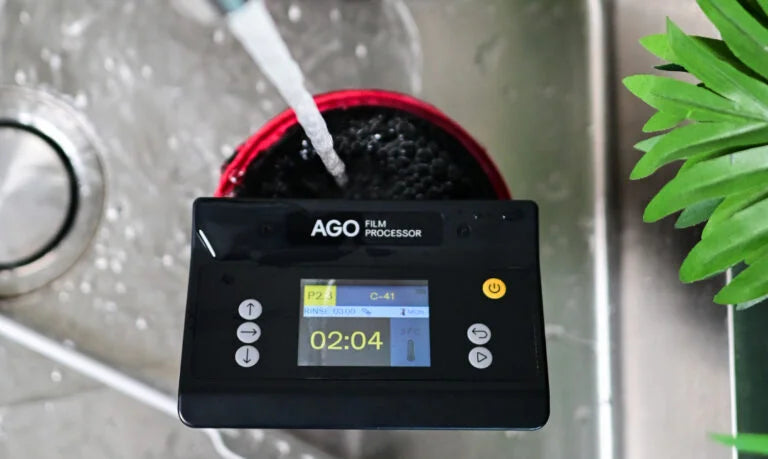
The AGO Film Processor works with standard Paterson tanks and handles agitation, timing, and temperature throughout the process — B&W, C-41, E-6, and others. Pour in your chemistry and press start.
See the AGO Film ProcessorChoosing Your B&W Developer
Unlike C-41 colour chemistry, B&W developers are not standardised. There are many good options, each with slightly different characteristics. The most popular choices for beginners are these three.
- Rodinal (also sold as Adonal). One of the most popular developers around. It has a very long shelf life as a concentrate, works with almost any B&W film, and is easy to mix. Known for its grain character and sharpness.
- Ilford ID-11 / Kodak D-76. Fine-grain developers that work well as all-rounders if you prefer smoother, lower-grain results.
- Ilford DDX. Particularly good for push processing, which means shooting film at a higher ISO than its rated speed. If you ever shoot a roll at the wrong ISO by mistake, here is how to push it four stops and rescue it.
One thing to know from the start. B&W developer is typically one-shot. You mix a working solution, develop one roll, and discard it. This gives the most consistent results. Fixer works differently and can be reused for many rolls. Track how many rolls your fixer has processed and occasionally test it. A small strip of unexposed film should clear within two minutes in fresh fixer. If it takes longer, it is time to replace it.
How to Find Your Development Time
This is where B&W is completely different from C-41. Development times are not fixed. They depend on your film stock, your developer, the dilution ratio, and your agitation method. Never guess, and do not just use a time you found in a comment somewhere online.
The resource every B&W developer uses is the Massive Dev Chart at digitaltruth.com. It has been online since 1995 and contains both manufacturer-published times and verified user submissions for thousands of film and developer combinations. It is free.
How to use it
Go to digitaltruth.com/devchart.php. On the left side you will see two dropdowns. The first says "Select a Film" and the second says "All Developers". Choose your film from the first list (for example, Ilford HP5+), choose your developer from the second (for example, Rodinal), and click Search.
The results appear as a table with these columns: Film, Developer, Dilution, ASA/ISO, time for 35mm, time for 120, time for sheet film, Temperature, and Notes. Find the row that matches your film's ISO and your chosen dilution. The time shown in the 35mm or 120 column, at 20°C, is your development time.
Using Ilford HP5 Plus rated at ISO 400 with Rodinal as an example, the chart gives you these starting points.
- Dilution 1+25 at 20°C: 6 minutes for 35mm
- Dilution 1+50 at 20°C: 11 minutes for 35mm
Write this number down before you do anything else. This is the number that matters most.
How to calculate how much developer to mix
For one roll of 35mm in a standard Paterson tank, you need 290 ml of working solution. For 120 format, around 500 ml.
At a 1+25 dilution with 290 ml total, divide 290 by 25 to get 11.6 ml of concentrate. Top up with water at 20°C to make 290 ml total. Simple arithmetic, done once before you start.
If you are using the AGO Film Processor
Reduce your development time from the chart by about 15%. The AGO uses continuous rotation, which is more active than intermittent inversions, so it develops faster. A 10-minute hand development time becomes about 8.5 minutes with the AGO.
Watch: Developing Film with the Starter Kit
Before reading through each step, watch the full process using the Black & White Starter Kit. Seeing it once makes the written steps much easier to follow.
Step-by-Step: Developing Your First Roll
Once you have looked up your development time and mixed your chemistry, you are ready to begin. Read through the whole sequence once before you start. Each step flows into the next and a couple of them have no margin for hesitation.
Load the film (in darkness)
In your changing bag or darkroom, open the film canister and trim the leader to a straight edge with scissors. Load the film onto the reel using the ratchet action. It should feel smooth. If it fights you, back up slightly and try again. Place the loaded reel in the developing tank and seal it completely. Once the lid is on, every remaining step happens in normal room light.
A word on this step. Reel loading is the most common stumbling block for beginners. Practice with an old, already-developed roll in full daylight first. Getting the motion right before doing it blind inside a changing bag helps a lot.
~1 minuteLook up your time and prepare your chemistry
Before you mix anything, open the Massive Dev Chart, select your film and developer, and confirm your development time. Write it down. Then mix your developer at the correct dilution and mix your fixer according to its instructions. Both should be at 20°C when you check with your thermometer. Room-temperature chemistry usually needs only a short wait, so mix it slightly ahead of time and let it settle.
5–10 minutes prepDevelop
This step has a specific rhythm. Follow it exactly.
- Pour and start. Pour the developer into the tank and start your timer immediately.
- First 30 seconds. Agitate continuously. Turn the tank fully upside down and back, over and over without stopping, for the full 30 seconds.
- Remaining time, every 30 seconds. Do 4 inversions and stop. One inversion is the tank fully upside down and back. Repeat this every 30 seconds until the timer ends.
- When the timer ends. Pour the developer out immediately. Do not wait.
Using the AGO Film Processor. Attach the AGO to your tank, pour in the developer, and press start. The AGO agitates continuously and monitors temperature in real time. If your developer runs above or below 20°C, it adjusts the remaining time to compensate.
Varies by film — 6–11 min typicalStop bath
Pour in your stop bath and agitate for 30 seconds to 1 minute, then pour it out. A plain water rinse works for B&W, though a dedicated stop bath solution halts development more cleanly and reliably.
30 sec – 1 minFix
Pour in the fixer and agitate for the first 30 seconds, then 5 seconds every minute. Fixing time is typically 4–10 minutes depending on the brand. Pour the fixer back into its storage bottle for reuse when done.
4–10 minutesWash
Rinse with running water for 5–10 minutes to remove remaining chemistry. A hypo-clearing agent (such as Ilford Hypo Clear) cuts wash time if you want to save water.
5–10 minutesWetting agent (optional)
Add a few drops of wetting agent (such as Kodak Photo-Flo) to a final rinse bath and soak for 1 minute. This reduces surface tension and helps the film dry without water spots. Discard the solution after use.
1 minuteDry
Hang the film with clips in a clean, dust-free area. Attach a weighted clip at the bottom to keep it straight. Let it dry for 1–2 hours before touching, cutting, or scanning. Wet film scratches permanently. Don't rush this step.
1–2 hoursScan or print
Once dry, scan your negatives to create digital files, or take them to a darkroom for silver gelatin printing. B&W negatives scan well and are great for darkroom printing.
Cut, sleeve, and store
Cut the dried film into strips of 4–6 frames and store in archival negative sleeves. Keep flat in a binder or box away from heat and humidity. Properly stored B&W negatives last decades.
Agitation Methods for Black and White Development
Agitation keeps fresh chemistry in contact with the film emulsion and prevents uneven development. There are two main approaches.
- Hand agitation (inversion). Agitate continuously for the first 30 seconds, then 4 inversions every 30 seconds for the rest of the development time. This is the standard method for manual development and requires no additional equipment.
- Rotary agitation (continuous). Motorised processors like the AGO Film Processor use continuous horizontal rotation. Because constant agitation is more active than intermittent inversions, reduce your development time by about 15% when switching to rotary. A 10-minute hand time becomes around 8.5 minutes with the AGO.
Troubleshooting Common B&W Development Problems
| Issue | Likely Cause | Fix |
|---|---|---|
| Thin, flat negatives | Temperature too low, time too short, or exhausted developer | Verify temperature and timing; use fresh chemistry |
| Dense, blocked-up negatives | Temperature too high or development time too long | Check thermometer accuracy; reduce time or temperature |
| Streaks along the film | Inconsistent or insufficient agitation | Follow agitation pattern consistently; check tank seal |
| Milky or opaque areas | Insufficient or exhausted fixer | Re-fix in fresh fixer; track roll count for fixer reuse |
| Water spots on dried film | Skipped wetting agent or mineral-rich tap water | Use wetting agent in final rinse; switch to distilled water |
| Uneven density across frames | Film touching itself on reel during loading | Practice reel loading in daylight with a sacrificed roll |
Tips for Better Results
- Always look up your time on the Massive Dev Chart. Never guess. The combination of film stock, developer brand, dilution, and temperature all affect the correct time. The chart at digitaltruth.com covers thousands of combinations and is free to use.
- Mix chemistry ahead of time and let it stabilise at room temperature before checking with your thermometer.
- B&W developer is one-shot; fixer is reusable. Mix a fresh working solution for each roll, and track your fixer carefully.
- Test fresh chemistry on a scrap piece of unexposed film before using it on anything precious. It should turn black in developer, and clear in fixer within two minutes.
- Minimise air in stored bottles to slow oxidation and extend shelf life.
- Practice reel loading in daylight first. A few minutes practising with a sacrificed roll makes doing it blind in a changing bag far less stressful.
- Work safely. Wear nitrile gloves when handling chemistry, ensure good ventilation near a window or open door, label all bottles clearly, and never pour fixer down the drain. Most local recycling centres accept used photographic fixer.
Getting Started with B&W Film Development at Home
The Black & White Starter Kit includes everything you need to develop your first roll: tank, reels, changing bag, chemistry, thermometer, measuring graduates, and film clips. You can be developing within hours of unboxing. At €135, you will typically break even after around 10 rolls compared to typical lab prices.
Once you are comfortable with B&W and ready to try colour, the AGO Film Processor handles agitation and temperature for B&W, C-41, E-6, ECN-2, and RA-4. It monitors temperature throughout and adjusts development time on the fly. Runs up to 8 rolls at once.
Frequently Asked Questions
Do I need a darkroom to develop black and white film at home?
No. You do not need a darkroom. The only darkness required is for the 1–2 minutes it takes to load your film and seal the tank. A changing bag does the job and works anywhere, so you can process 35mm film at home without a darkroom. Once the tank is sealed, all chemistry steps are done in normal light.
How long does it take to develop black and white film at home?
The chemistry steps take around 20–30 minutes depending on your film and developer combination. Add 10–15 minutes to mix and check temperatures, plus 1–2 hours for drying. Total time from start to finished dry negatives is typically around 2 hours.
What black and white films can I develop at home?
Any standard black and white film: Ilford HP5 Plus, Ilford Delta 400, Kodak Tri-X, Kodak T-Max, Fomapan, Kentmere, and many others. Chromogenic B&W films like Ilford XP2 Super use C-41 colour chemistry, not standard B&W developers.
What film formats can I develop at home?
All standard formats: 35mm, 120 medium format, 127, 110, 220, and large format sheet film. 35mm and 120 are the most common starting points, and most starter kits include reels for both.
How much does it cost to develop film at home?
Under €1 per roll in chemistry once you have a tank and reels. A bottle of Rodinal at 1+50 dilution can develop 50 or more rolls. Fixer is reusable and similarly inexpensive. The B&W Starter Kit covers all the initial equipment at €135.
Can I reuse B&W developer?
Most B&W developers are one-shot: mix a working solution, develop one roll, and discard. This gives the most consistent results. Fixer is different and can be reused for many rolls. Track how many you have processed and test it periodically.
What is the best B&W developer for beginners?
Rodinal (also sold as Adonal) is one of the most popular choices. It has a very long shelf life as a concentrate, works with nearly any B&W film, and is easy to mix. Ilford ID-11 and Kodak D-76 are good alternatives if you prefer finer grain.